How to Export Your Figma Design With Scaled Images?
Export your Figma design with scaled images using UiChemy, for control over image quality and performance.
Image scaling means adjusting the size of an image without changing its actual content or design. In Figma, this is normally done at export time by choosing a scale factor, like 1x (original size), 2x (double size), or 0.5x (half size), to generate image assets optimized for different screen types and performance needs.
You can export your Figma design into WordPress with scaled images using UiChemy, no external tools required.
Why is Scaling Needed Before Exporting?
Without proper scaling, you can run into:
- Blurry visuals on Retina or high-DPI screens
- Large file sizes that slow down website or app performance
- Longer export times due to uncompressed or oversized assets
Scaling images appropriately helps you deliver cleaner visuals while keeping your projects lightweight and fast.
How Scaling Works
UiChemy provides flexible export options that let you control image resolution using scale values. For example, an image that's 100px × 50px in your design can be exported at different scales:
| Scale | Description | Example (Width × Height) |
|---|---|---|
| 1x | Original size | 100px × 50px |
| 2x | Double size for high resolution | 200px × 100px |
| 0.5x | Half size for smaller files | 50px × 25px |
You can also set a custom scale (e.g. 1.5x) directly in the export settings.
When and Where to Use Scaling
- High-density screens, export at 2x or 3x for crisp, sharp visuals on Retina or high-resolution displays
- Performance optimization, scale down (e.g. 0.5x) to reduce file sizes and improve page load times
- Faster exports, smaller images reduce processing time during export in Figma
- Avoiding blurry uploads, proper scaling keeps images clear and professional wherever they're used
Choosing the right scale depends on how your design will be used, sharp visuals, fast performance, or a balance of both.
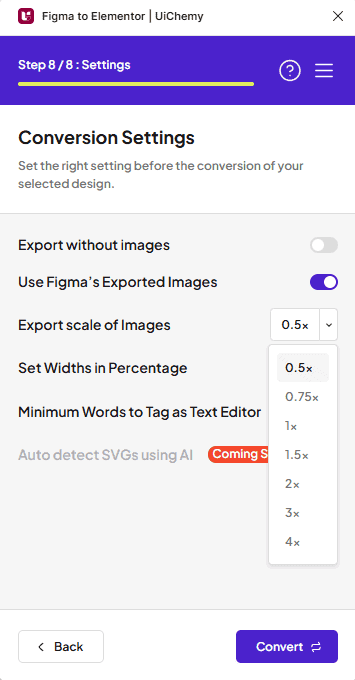
Scaled Image Export in UiChemy
You can toggle Figma's export settings, choose the export scale within the plugin, and export the right image size for your needs, all in one workflow. There are two ways to do this:
Option 1: Step by Step Method
- Open the UiChemy plugin in Figma.
- Select Step by Step Method and click Start.
- Select the top-level page or frame of your layout, then click Next until you reach the Conversion Setting tab.
- Under Conversion Settings, turn on Use Figma's Exported Images.
- In the Export scale of Images dropdown, select the desired scale value.
- Click Convert to start converting your design, you'll be redirected to the site page once it's complete.
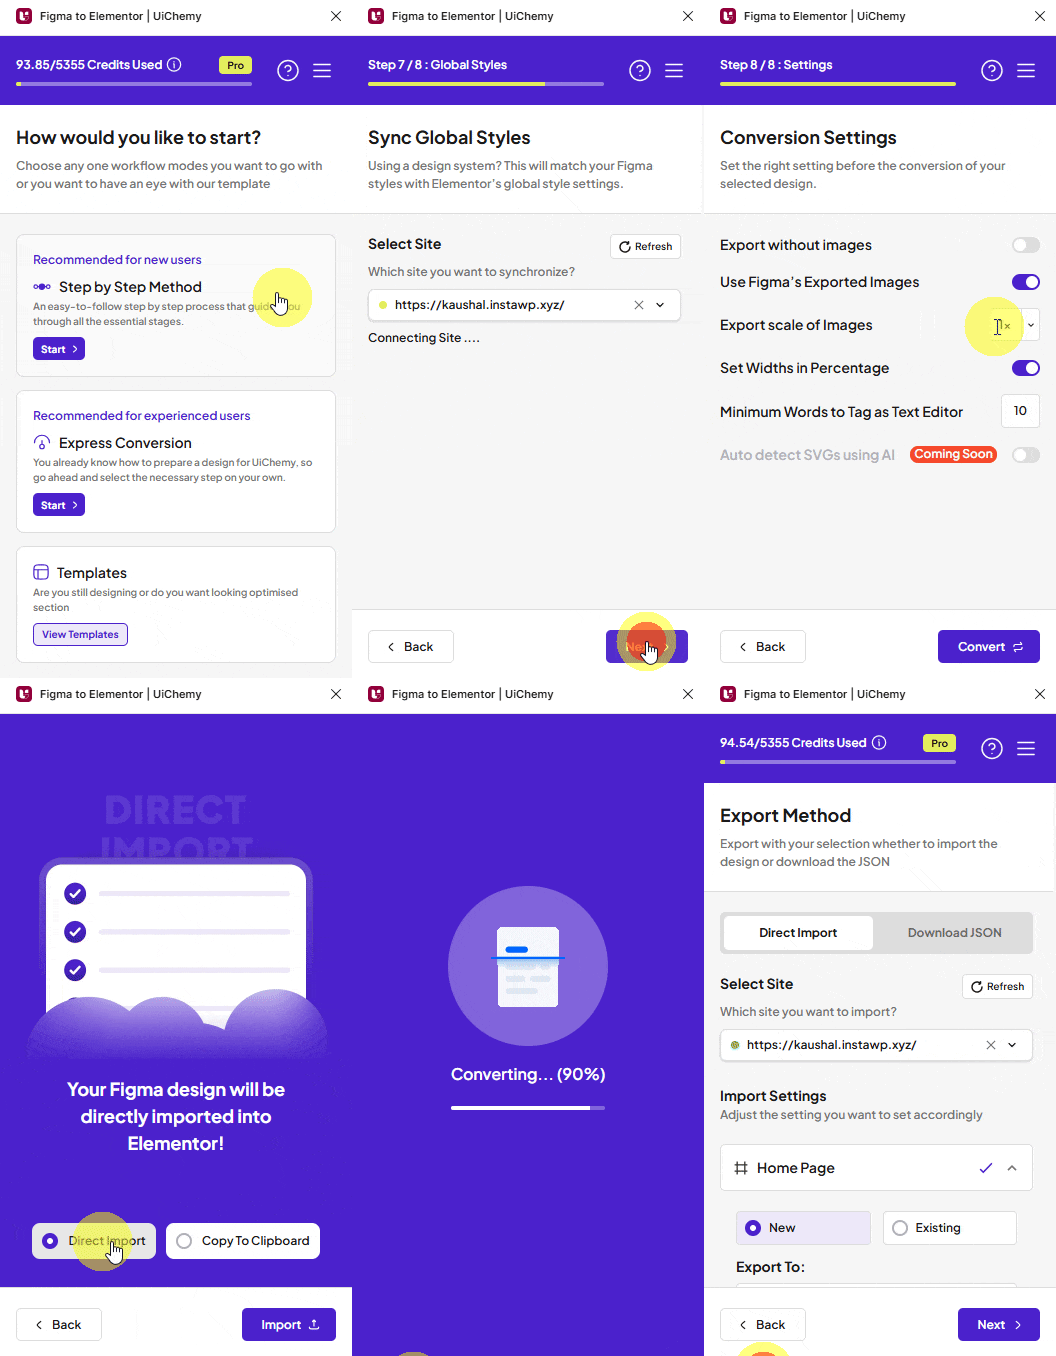
Option 2: Quick Conversion
- Open the UiChemy plugin in Figma.
- Select Quick Conversion and click Start.
- Select the top-level page or frame, then click Next until you reach the Quick Conversion tab.
- Under Quick Conversion, click Conversion Settings.
- Turn on Use Figma's Exported Images.
- In the Export scale of Images dropdown, select the desired scale value.
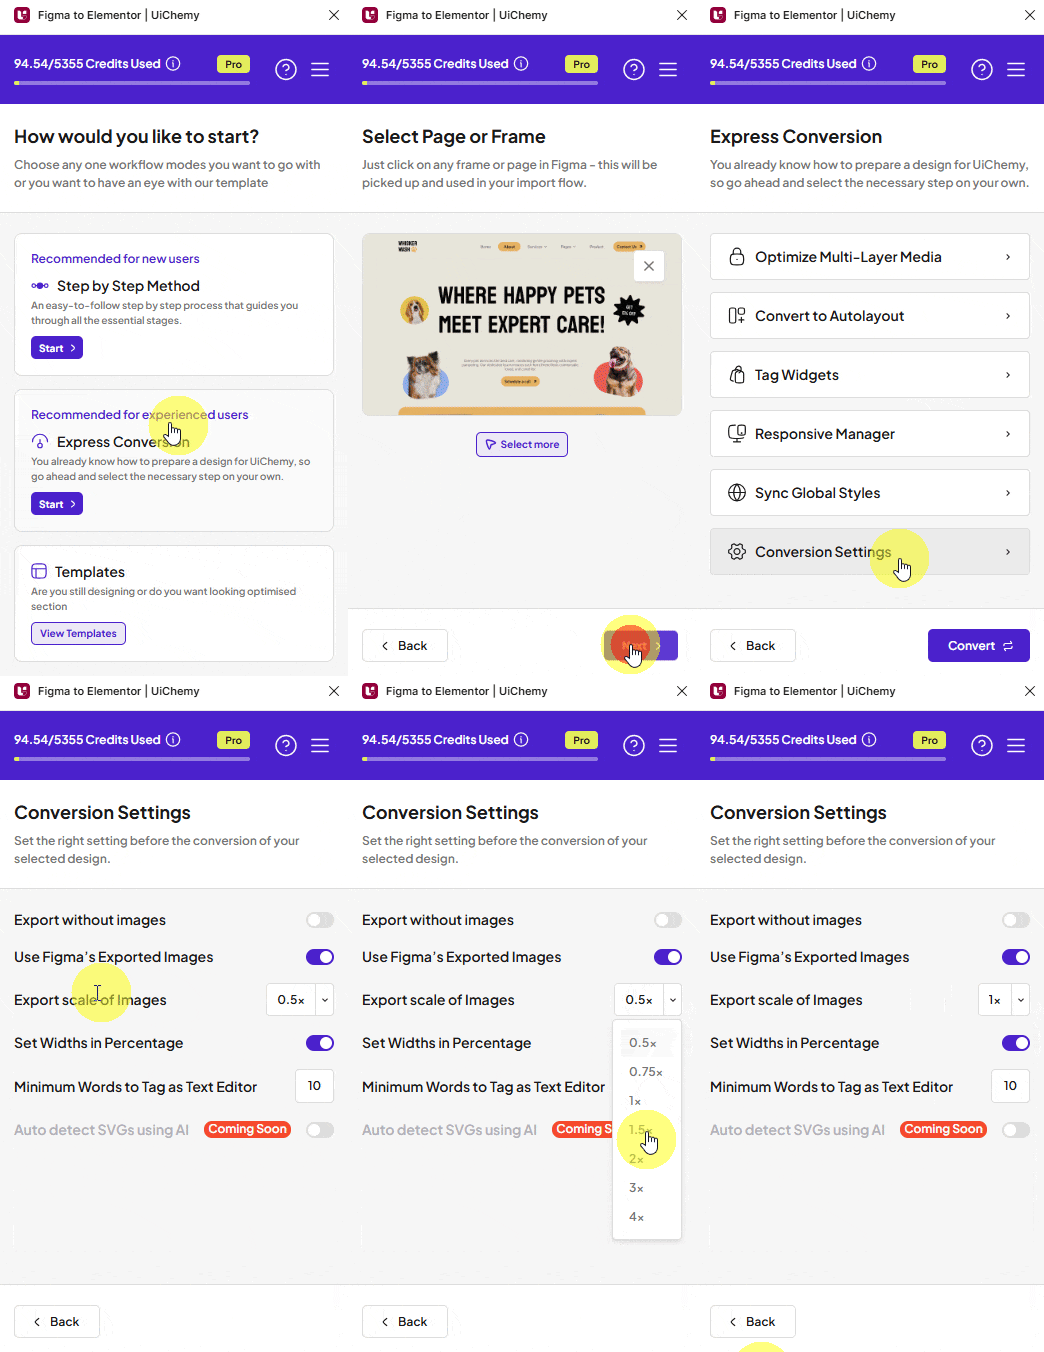
Once you export your design, the layout uses resized images based on your specified scale value, so the template opens faster thanks to the smaller image sizes.
Frequently Asked Questions
What issues can arise if I don't scale images before exporting?
You may get blurry visuals on high-DPI screens, larger file sizes that slow down site performance, and longer export times from oversized assets. Proper scaling keeps things clean and lightweight.
When should I use 2x or 3x scaling?
Use 2x or 3x for designs intended for high-density screens like Retina displays, so images stay sharp and clear.
What's the difference between Step by Step Method and Quick Conversion?
Step by Step Method walks you through the export with detailed options, while Quick Conversion gets you there faster with fewer steps. Both let you set the image export scale.
How does scaling images impact website performance?
Scaling down reduces file sizes, which improves page load times and reduces bandwidth use, especially valuable on mobile devices.