Set up the UiChemy WordPress Plugin
Install the UiChemy WordPress plugin, sign in, and choose how you want to work with AI Express Mode.
This is where UiChemy lives on your site. You install it once, sign in, and choose how you want to work. A short setup wizard walks you through it.
You'll need an Administrator account on the WordPress site to set UiChemy up.
Step 1: Install and activate
- In your WordPress admin, go to Plugins → Add Plugin, search for UiChemy, install it, and click Activate.
- UiChemy opens its setup page automatically.
You can also upload the plugin manually via Upload Plugin if you downloaded the .zip file from your account.
Step 2: Sign in with UiChemy
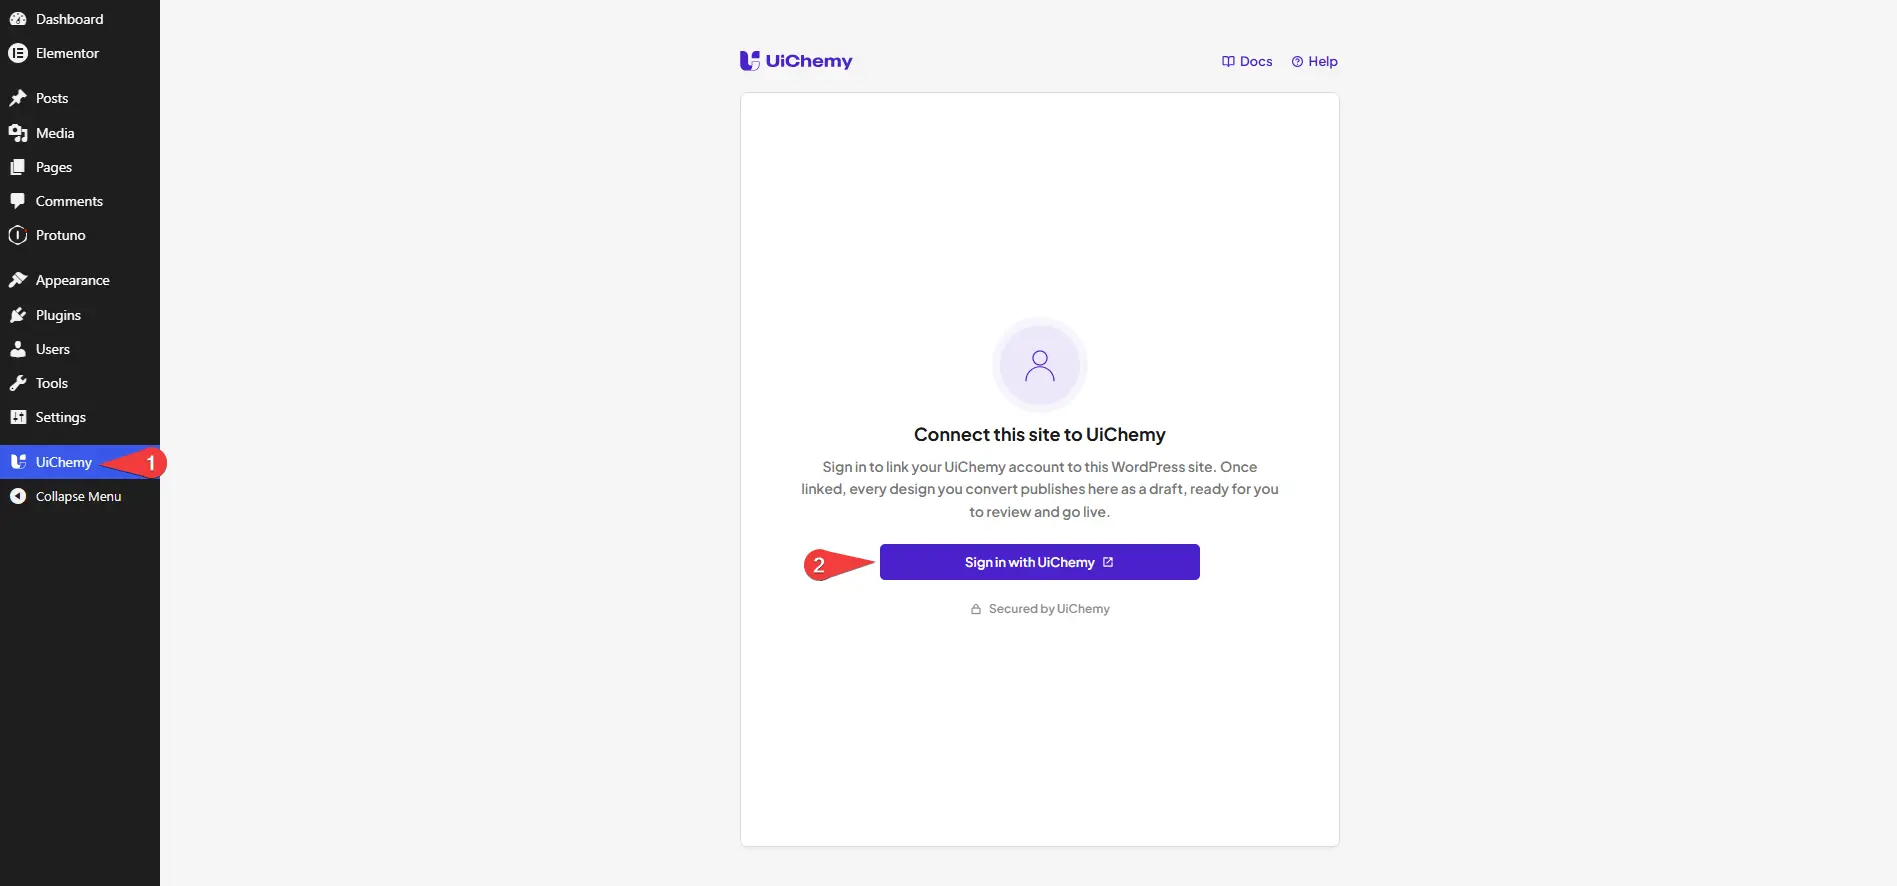
The first screen you see is "Connect this site to UiChemy." Signing in links your UiChemy account to this WordPress site, so every design you convert publishes here as a draft.
- Click Sign in with UiChemy.
- On the UiChemy authorization page, check the account you're signing in as and click Allow (this lets the plugin access your account info and view your licenses and subscription).
- You'll see "Access granted" and get redirected back to the UiChemy dashboard, signed in.
Screenshot: the "Authorize UiChemy WP Plugin" page and the "Access granted" confirmation.
Step 3: Follow the setup wizard
The wizard has three steps.
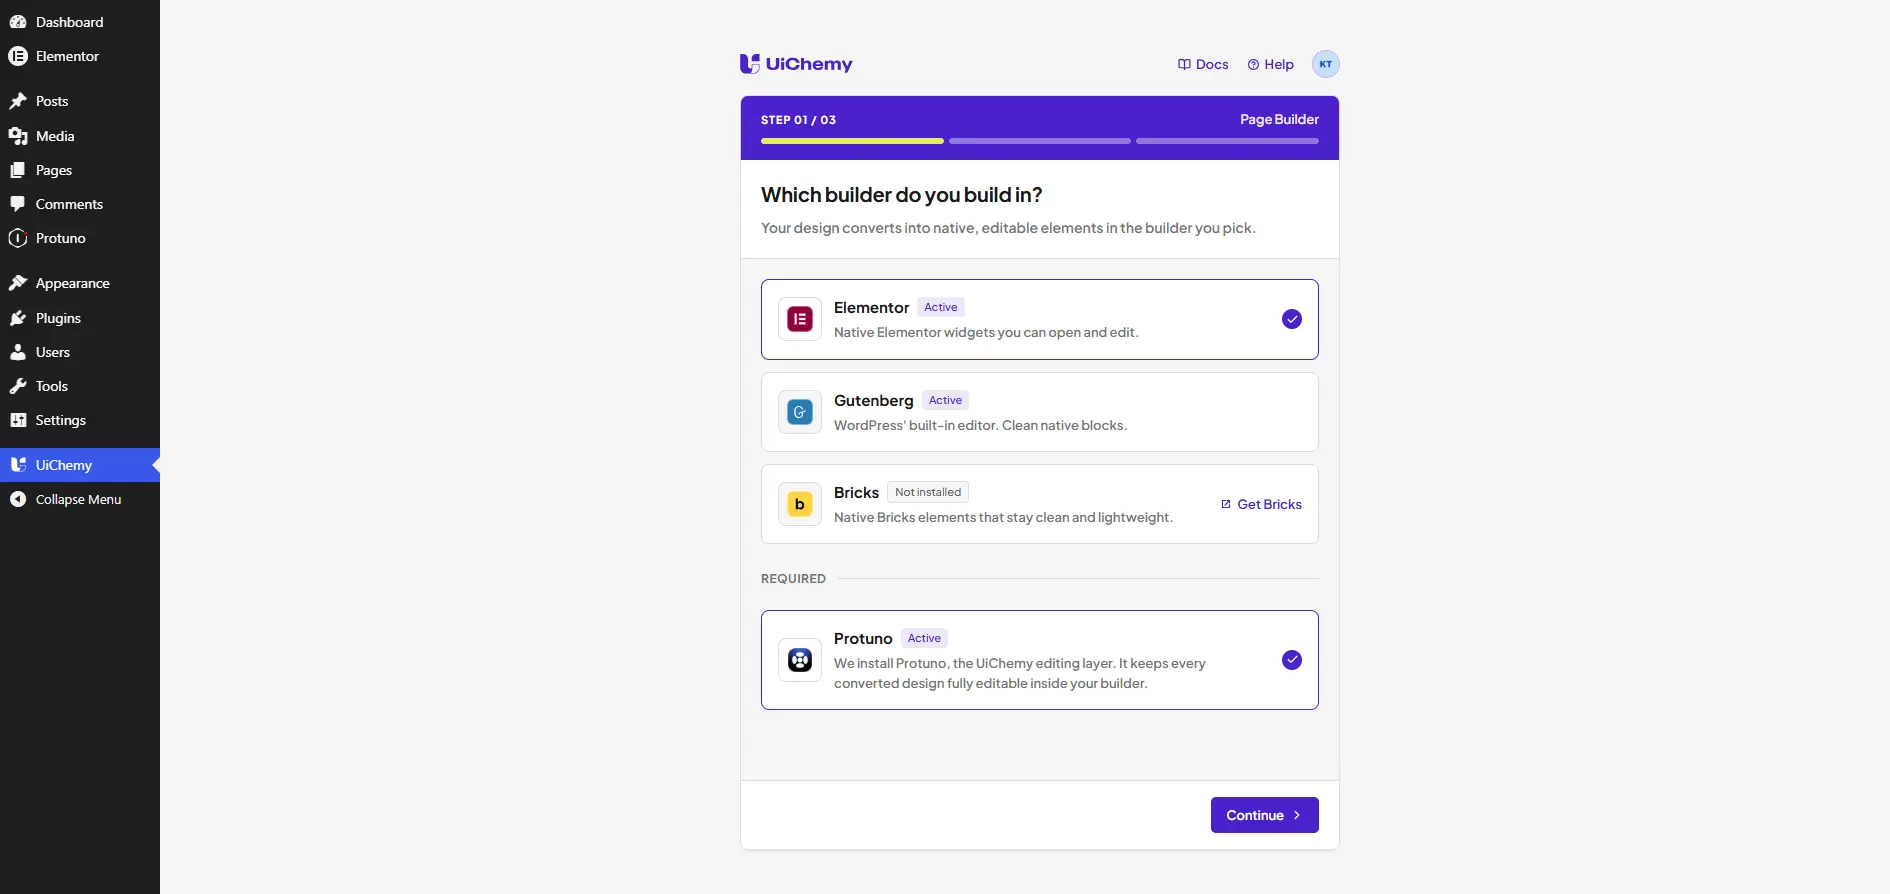
Page Builder
Choose the builder you work in: Elementor, Gutenberg, or Bricks. Each one shows a status badge, Active if it's ready to use, or Not installed with a link to install it (e.g. Get Bricks) if it isn't. If you choose Elementor, UiChemy also installs its companion, Protuno.
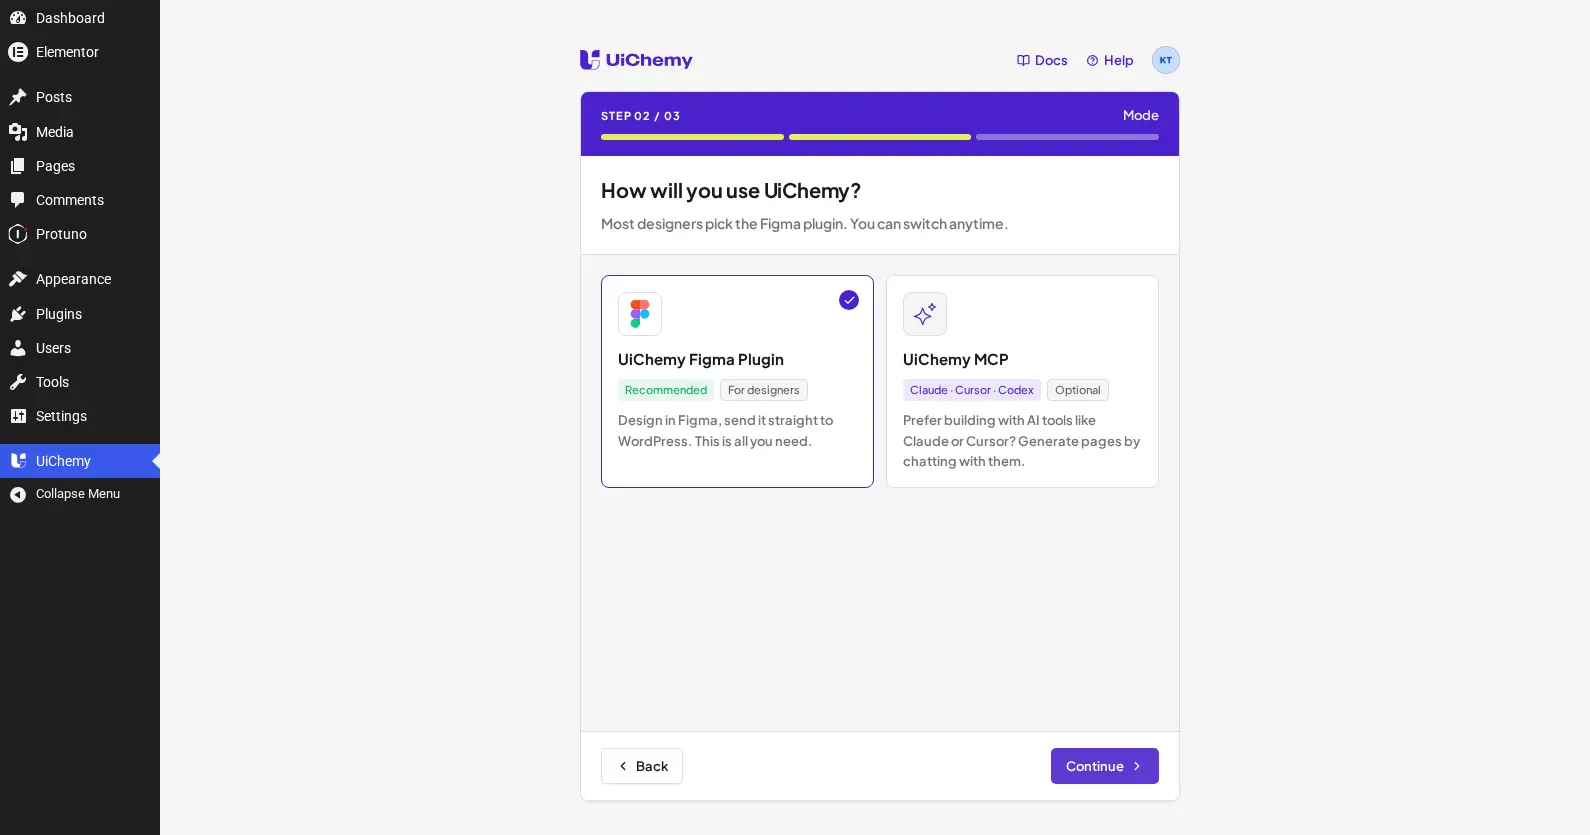
Mode
Choose how you'll use UiChemy (see the two modes below). The two modes appear when you pick Elementor; on Gutenberg and Bricks, UiChemy MCP shows as "Coming soon".
Connect
Copy your Connection Link and follow the on-screen "Connect in three steps" guide: install the UiChemy plugin in Figma, open it and go to Site Connection, then paste your Connection Link and click Connect. Click Open Dashboard when you're done.
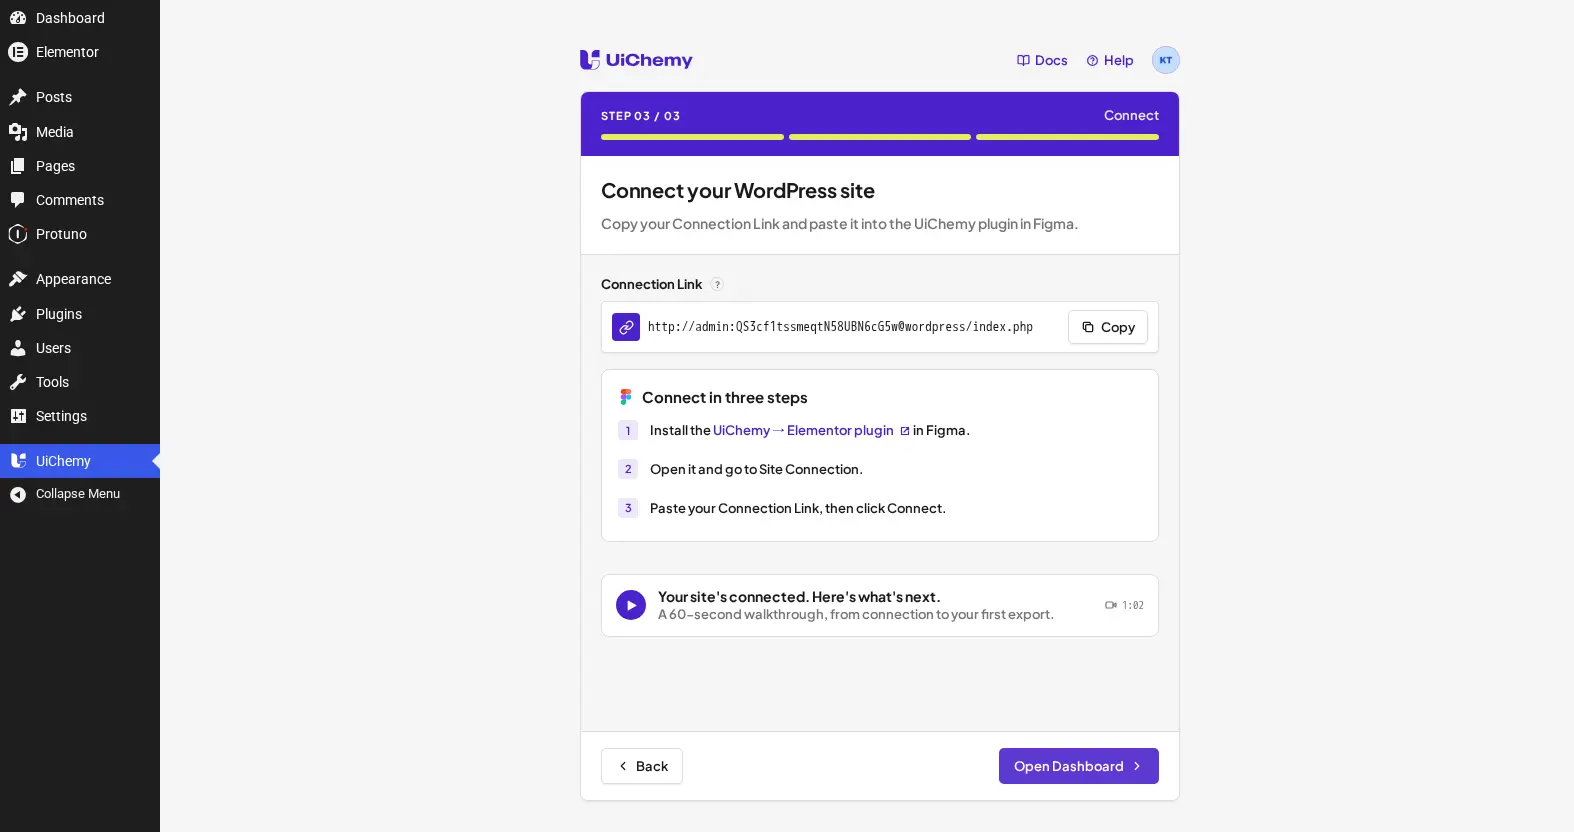
The Connect step also includes a short "Your site's connected, here's what's next" video walkthrough, covering connection through your first export.
Protuno is required
On the Page Builder step, you'll see a Required section for Protuno. It's UiChemy's editing layer, it powers the Proton Widget and keeps every converted design fully editable inside your builder; its MCP server also lets AI tools convert designs on your site. UiChemy installs it automatically when you pick Elementor, and once installed it shows the same Active badge as the page builder itself.
If Protuno isn't installed yet, you'll see a "Protuno is not installed" message here instead, with an Install & Activate Protuno button to continue.
The two modes
This choice is about how you drive UiChemy, not which conversion you run. You pick one during setup and can switch anytime from the dashboard.
| Mode | Who it's for | What it is |
|---|---|---|
| UiChemy Figma Plugin (recommended) | Designers | Design in Figma and send it straight to WordPress. This covers both AI Express Mode and Classic Mode, and is all most people need. See Connect your site. |
| UiChemy MCP (optional) | People who build with AI tools | Convert from tools like Claude, Cursor, or Codex, for example, share a Figma design link and ask your tool to build it as a Proton Widget on your connected site. Elementor only for now (shown as "Coming soon" on Gutenberg and Bricks). See Set up UiChemy MCP. |
The dashboard
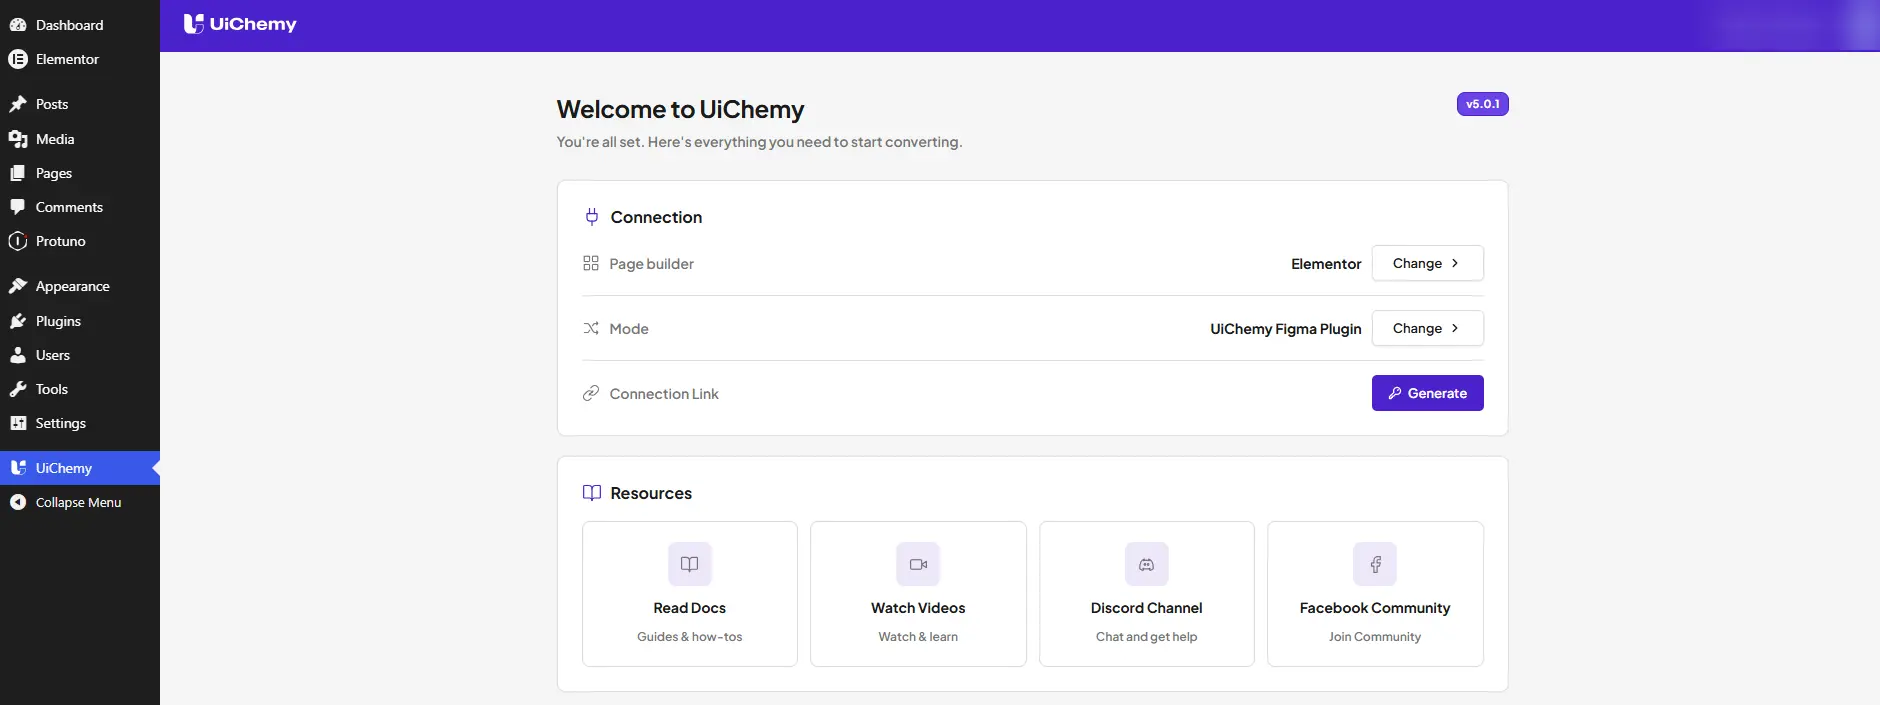
After setup, you land on the "Welcome to UiChemy" dashboard, "You're all set. Here's everything you need to start converting," with your installed version shown in the corner (e.g. v5.0.1). What it shows adapts to the builder and mode you picked.
Connection
A Connection card shows your current setup:
- Page builder, your builder (for example, Elementor), with Change to switch.
- Mode, your mode (UiChemy Figma Plugin or UiChemy MCP), with Change to switch.
- Connection Link, your link, with Copy. After a page refresh you may see a Generate button instead, click it to create a fresh link (the link isn't stored between visits, for security).
- Application Password (MCP mode only), shown as Active, with Copy.
Add the UiChemy MCP (MCP mode only)
When your mode is UiChemy MCP, a second card gives you the ready-to-paste config, with tabs for Prompt / Claude Desktop / Codex / Cursor / Antigravity and Regenerate, Copy, and Auto Connect buttons. See Set up UiChemy MCP.
Resources
A Resources card links to Read Docs (Guides & how-tos), Watch Videos (Watch & learn), Discord Channel (Chat and get help), and Facebook Community (Join Community).
In MCP mode, a second "Add the UiChemy MCP" card also appears here.
You can change your builder or mode anytime from here, and the dashboard updates to match.
If it doesn't work
- "Administrator access required." UiChemy setup needs an Administrator account.
- Environment warning. UiChemy needs WordPress 6.6+ and PHP 7.4+. Update if prompted.
- Can't connect / Application Passwords blocked. On a live site you need SSL (https). On a local site, UiChemy can enable it for you, or add
define( 'WP_ENVIRONMENT_TYPE', 'local' );towp-config.phpand re-check. - REST API blocked. A security plugin may be rejecting requests, allow UiChemy through.
Next steps
- Figma mode → Connect your site
- MCP mode → Set up UiChemy MCP